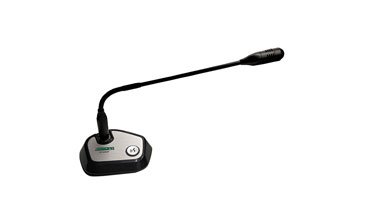
Conference microphone
Hand microphone
Set up:
If you want a balanced, natural sound, place the microphone 4 to 12 inches in front of your mouth and slightly off the center axis to avoid breathing noise.
If the microphone is too close to the one-way microphone, it will produce a boom because of the proximity effect.
This kind of excessive bass can be adjusted by an equalizer (low frequency attenuation).
If you talk too directly to the microphone, there will be breathing noise. An accessory blowout preventer can be used to control breathing noise near the speaker.
Use:
Only hold the cylinder body when used. Do not grasp or hold the microphone net cover, which will affect its pointing characteristics.
Gooseneck microphone
Set up:
Place the microphone 8 to 16 inches in front of the mouth, slightly off the center axis. Aim directly below the mouth to avoid breathing noise.
Do not touch the microphone or gooseneck accessories after placing the speaker in place.
Use:
Keep the distance between the microphone fixed to ensure the volume stability.
Do not tap or blow into the microphone.
Clip microphone
Set up:
The microphone should be placed as close to the mouth as possible, preferably under the collar.
Avoid placing it under clothes or other materials that may touch or rub the microphone.
Use windshield, especially one-way collar clip microphone.
Use:
To make sure you are "always talking to the microphone", turn around instead of turning your head.
Even the slightest noise, the collar-clip microphone transmits it to the sound system. As long as you wear it, don't touch the microphone or cable.
Avoid blowing directly into the microphone.
Head-mounted microphone
Set up:
Don't put the microphone directly in front of your mouth, it will pick up the breathing noise.
Put the microphone at the corner of your mouth and don't touch your face.
Use windshield to eliminate breathing noise.
Use:
Adjust the headband to ensure that it is fixed and comfortable.
Don't knock or hold down the microphone.


 【DSPPA Demo】PAVA8000 EN54 Voice Evacuation SystemNovember 12, 2020Abstract: DSPPA PAVA8000 EN54 Voice Evacuation SystemToday, we are gonna show you a demo about our PAVA8000 EN54 Voice Evacuation System.PAVA8000EN54 Voice Evacuation System can not only support manua...view
 The National Standard Approval Meeting held in BeijingJuly 19, 2019The National Standard Approval Meeting held in BeijingThe approval meeting of the National StandardTechnical standard of public address system engineeringis held in Beijing on July 16, 2019. Xue Chang...view


